As the autumn air settles over Snoqualmie, a familiar, heartwarming tradition that many families eagerly anticipate is pumpkin carving. It’s a quintessential fall activity that brings neighbors together and creates lasting memories for children. From the scenic beauty of our valley to the cozy atmosphere of our homes, Snoqualmie offers the perfect setting for this creative endeavor. This guide is designed to help families in our community navigate the pumpkin carving process with ease and, most importantly, with safety as the top priority.
Embracing the spirit of Halloween doesn’t have to come with scraped knuckles or tears. By implementing a few simple strategies, you can transform pumpkin carving from a potentially hazardous task into a delightful family affair. We’ll explore how to choose the best pumpkins, set up a safe carving station, and unleash your inner artist with creative ideas suitable for all ages. Get ready to make this Halloween carving season the most enjoyable and secure one yet, right here in Snoqualmie.

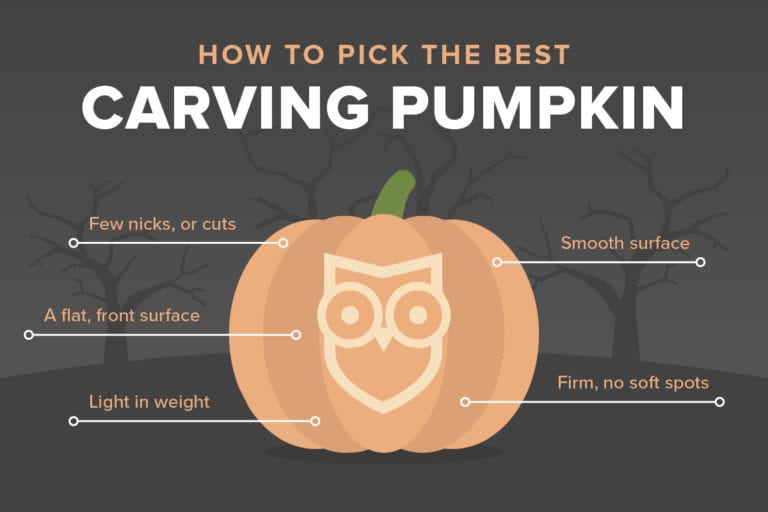
- Choose a smooth, firm pumpkin with a flat base for easier carving. Source: @safewise – safewise.com
Selecting the right pumpkin is the crucial first step towards a successful and enjoyable carving experience. When browsing local farms or grocery stores, look for pumpkins with smooth, less bumpy skin, as this makes drawing designs and carving much easier and safer. Avoid pumpkins that feel surprisingly light for their size, as this can mean thin walls that are prone to cracking. It’s also vital to inspect your chosen gourd for any soft spots, which often signal rot, or any nicks and cuts that could potentially lead to infection.
Another key factor is the pumpkin’s shape and surface. Aim for a pumpkin with a flat, stable base so it won’t wobble during carving. A relatively flat front surface will also provide a better canvas for your chosen design. Once you’ve found your perfect pumpkin, ensure you have a well-lit, sturdy workspace ready. Keep hands and tools dry throughout the process, and consider leaving the top stem intact for younger children, as this can prevent hands from going inside the pumpkin, reducing the risk of accidental cuts. Remember, there’s no need to rush; take your time to ensure everyone stays safe.
When it comes to designs, keeping things simple is often the best approach for younger carvers. Consider downloading easy-to-trace pumpkin templates beforehand, or let your child select a few cookie cutters to gently press into the pumpkin’s surface. These indentations can serve as a guide for a parent to carefully carve along, creating a personalized pattern. For the little ones who might not be ready for carving tools, or to keep them happily engaged while the grown-ups handle the sharp bits, a smaller, secondary pumpkin is a fantastic idea. Let them go wild with glitter, paint, stickers, or other craft supplies to decorate their own mini-masterpiece.
Safety extends to the lighting of your finished jack-o’-lanterns, too. While traditional candles offer a classic glow, they can pose a fire hazard, especially with children around. A safer alternative is to use battery-operated LED lights. These flicker realistically and eliminate the risk of burns or accidental fires, making them ideal for Snoqualmie homes. Additionally, remember that pumpkin carving can get messy, with slippery seeds and pulp sometimes ending up on the floor. Laying down newspaper or a disposable drop cloth under your workspace makes for quicker, easier cleanup, preventing any unexpected slips and falls once the carving is done.
- Source: safewise.com
- Header Image Source: AI-generated image
